Importing a whole intervention
Jump to navigation
Jump to search
You can download an existing intervention from the LifeGuide Community website and import it into your authoring tool, but first:
- Make sure you have set up your LifeGuide Community account at www.lifeguideonline.org
- The owner of the folder containing the intervention needs to give you access and add you to the folder. Once they have done this you will receive an automated email with an access code.
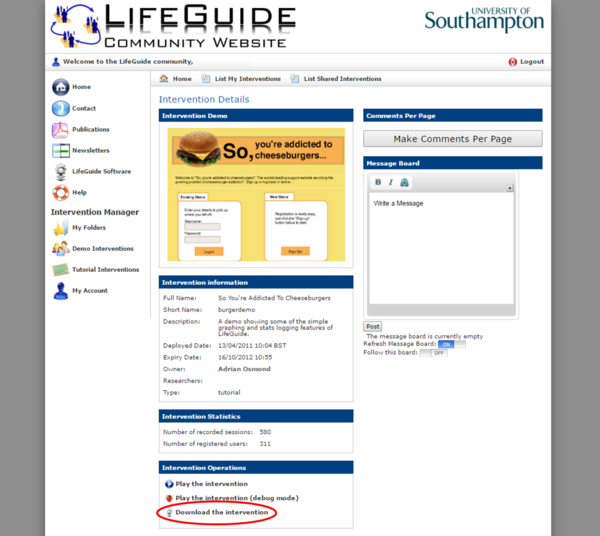
- Login to the LifeGuide Community website and enter the code when prompted. Click on 'My Folders' in the menu on the left hand side of the screen. The folder you have been added to should appear.
- Click on the version you would like to download and import. The most recent version is usually at the top, but check with the folder owner that you are choosing the correct version.
- Click Download the Intervention

Once you have downloaded your intervention, you will need to import it into the authoring tool. There are 2 ways of importing an intervention - Method 1 shown below is the quickest!
Method 1
- Open the LifeGuide Authoring Tool which should be on your 'C' drive.
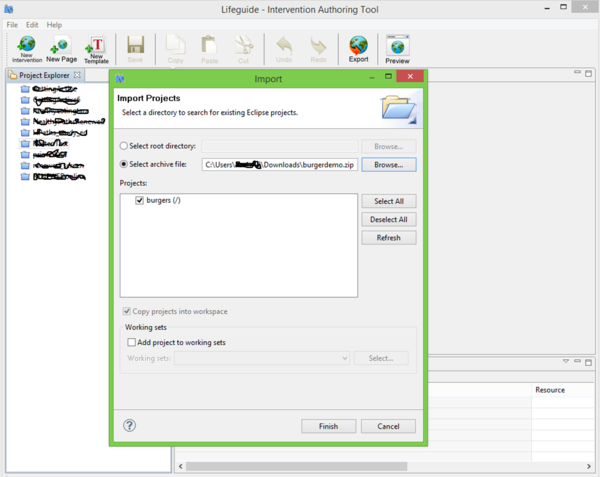
- Go to File, Import project.
- Click on the option Select archive file and click on Browse.
- Select the intervention you just downloaded (it usually appears in the downloads folder but this varies with different browsers) and Click on Open/OK.
- Click on Finish.
- Your intervention should then appear on the left hand side within the authoring tool, ready for you to work on.
- Large interventions may take some time to import and you may see the words Building Workspace appear at the bottom left-hand side of the Authoring Tool during this time.

Please note that if you import a project using Method 1, you can only have one version of the project in your Workspace at any one time. So if you want to import an updated version of your intervention into the Authoring Tool, you must first delete the older version.
Method 2
- A folder will appear showing all the files to be downloaded. Click Extract all files.
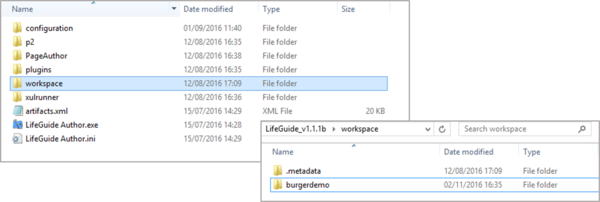
- Once all the files are extracted you will be asked to save them. Your LifeGuide Authoring Tool and Workspace should all be saved on your 'C' drive. You need to save the new intervention into your Workspace. Create a new folder within your Workspace and save the new intervention.
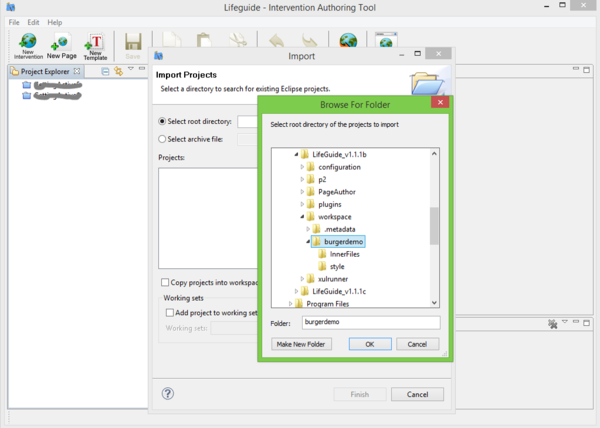
- Once you have saved it in the right place, you need to make it appear within the Authoring Tool. In the Authoring Tool, go to File, Import Project.
- Make sure the option Select root directory is selected, click 'Browse' and find the new folder you created within your Workspace. Click OK.
- Large interventions may take some time to import and you may see the words Building Workspace appear at the bottom left-hand side of the Authoring Tool during this time.
- Your intervention should then appear on the left hand side within the authoring tool, ready for you to work on.

