How do I upload an intervention to the LifeGuide Community website?
How do I upload an intervention to the LifeGuide Community website?
Before you can upload an intervention onto the LifeGuide Community website you will need to complete a form and email it to the LifeGuide team so they can arrange for you to have these permissions. Please click on the following link to access the form: https://www.lifeguideonline.org/contact/index
The LifeGuide Community website can be used to share your intervention with members of your research team or wider members of the LifeGuide community. We have three different intervention types:
- Development – recommended for interventions that are still in development: allows you to select who can access your intervention for viewing and commenting (e.g. your research team). You will need to create your own intervention folder for this.
- Tutorial – for uploading short demos that illustrate a particular logic function. All users registered on the LifeGuide community can access these if they wish to learn how to complete a logic function. Please upload tutorial interventions to the 'Tutorials' folder
- Demo – for uploading full interventions for all users of the LifeGuide Community to view and comment on. Please upload demo interventions to the 'demos' folder.
Please note that completed interventions intended to be used by end-users (apart from for testing purposes) should be hosted on a separate server (see how do I make my intervention live).
We need to be careful about how much memory the interventions we host on our server will use so any information you can provide about: estimated number of pages; number of videos used in your intervention and their duration; expected number of users will be useful in helping us to monitor our available memory capacity.
- Before uploading your intervention to the LifeGuide community site you first need to export it from the Authoring tool:
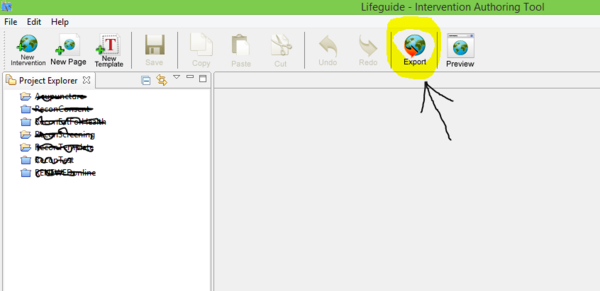
- Click the Export button on the top toolbar, or select the Export Project option from the File menu.
- A pop up window will show that allows you to choose where you want to save the file.
- Click the Browse button to select where you want to save your file.
- Give it a name and click the Save button.
- Once you have exported your intervention, login to the main LifeGuide Community website and click on Create New Folder near the top of the page. Give the folder a name and click on Create.
- Click on New Intervention.
- This will take you to a new page asking for details of your intervention including:
- A short name for the intervention – this will be used on the URL for the intervention
- A long name – this is the name that will be displayed on the LifeGuide Community website
- Description (optional) – this will be displayed on the LifeGuide Community website and enables you to give a brief description of what the intervention includes
- A start and end date (optional) – to detail how long you want the intervention to run
- Location of your intervention – for uploading the file that you have exported
- Intervention type – with the options to set interventions as development, demo or tutorial.
- Click the Create button at the bottom of the page.
