Containers
Containers are useful when delivering tailored messages to end-users. They allow you to organise numerous objects together to ensure that the length of a page is only as long as the feedback you need to give to the end-user.
Any type of textbox can go into a container, but if you are using a container to provide tailored messages you will need to use feedback boxes.
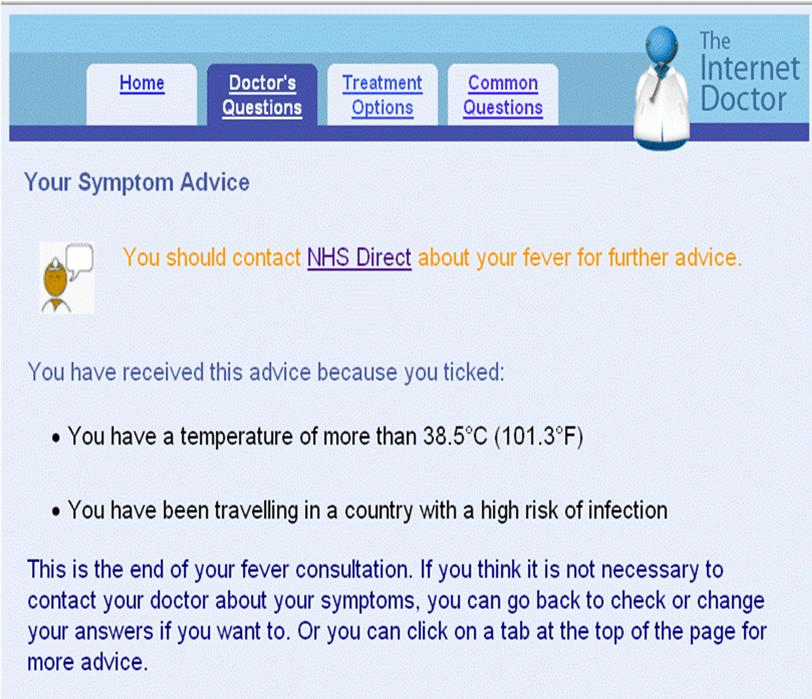
Giving tailored feedback: the example of the Internet Doctor
The Internet Doctor is an intervention which is aimed at helping people to manage their cold and flu symptoms. End-users can select if they want to check their sore throat, runny/stuffy nose, cough or fever symptoms. For each symptom the end-user is asked a series of ‘doctor’s questions’ that asks symptom severity, duration of symptoms and any other health factors that may impact on symptoms. They are then provided with tailored feedback based on their responses to their symptoms.
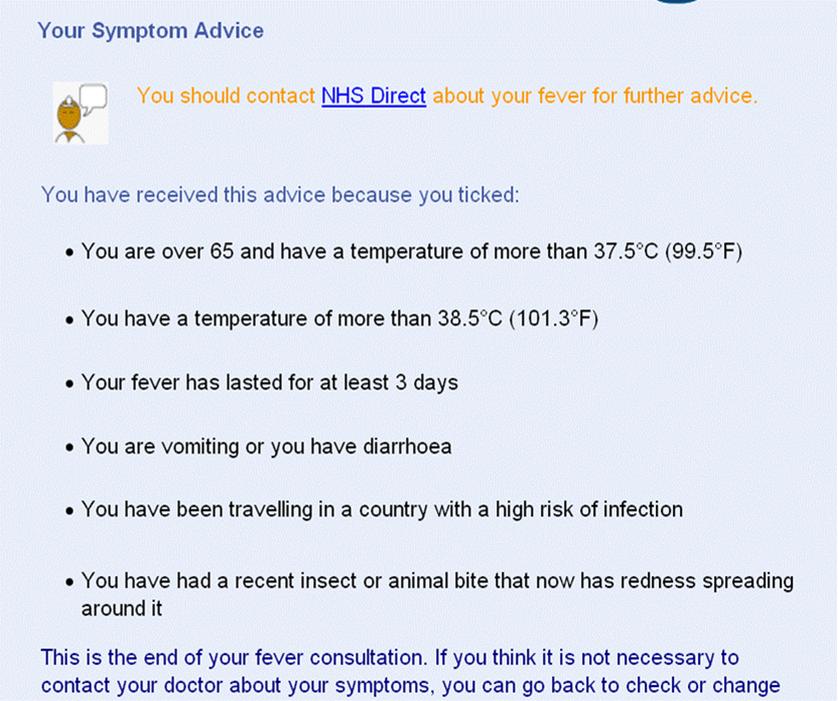
Example 1 below illustrates the tailored advice given to an end-user who has a high fever and has recently been travelling to a country where they may have picked up an infection. We can see in this example that this feedback is relevant to the person’s situation. This is because feedback boxes, containers and logic have been used to ensure that this end user receives the right information. In example 2 we can see what this page looks like in the authoring tool.
In example 2, each bullet pointed message is a separate feedback textbox with its own unique name. The logic for this example was written to show the feedback boxes to the end-user only if they have selected the interaction variable that corresponds with the message.
The separate feedback boxes have been put inside a container so that the relevant boxes are shown without leaving spaces where the redundant feedback boxes would be.
A demo version of the internet doctor intervention is available on the LifeGuide community site.
Creating containers
- Add a container to the page by clicking on the button in the insert panel.
- Select from either a Horizontal or Vertical container depending on how you want to group your objects together.
- A newly created container will be displayed on the top left hand side of the editing area.
The container will have a red dashed line around it which you will be able to see in LifeGuide, but end-users will not see this when your intervention is exported.
Using containers
- Move objects into the container by holding down the Ctrl key and then clicking and dragging it into the container. The border of the container will turn into a blue dotted line when the object is moving within the area. A list of objects placed in the container will display in the Properties menu.
- To move an object out of a container, hold the Ctrl key and click on the name of the text box from the list that displays in the properties area and drag it outwards.
- To delete an object in a container, you need to remove it from the container first then click on the object and press the delete key on your keyboard.
- If you need to edit an object in a container you will need to double click it on the page author screen. The properties menu will change to allow you to edit the object.
- To change the spacing between objects, double click on the object and drag the bottom of the object to make it larger or smaller.
- Change the order of objects in a container by dragging the boxes displayed in the Container Properties menu.

