How to put images onto your intervention pages
Jump to navigation
Jump to search
How to enter an image onto a page:
- Save the image into your workspace in the format of a JPG or PNG
- Check the size of your image - you do not want it to be too big as it will take up a lot of space and possibly slow down your intervention
- Once you have saved the image to your workspace it will be listed along with your pages on the left hand side of the authoring tool
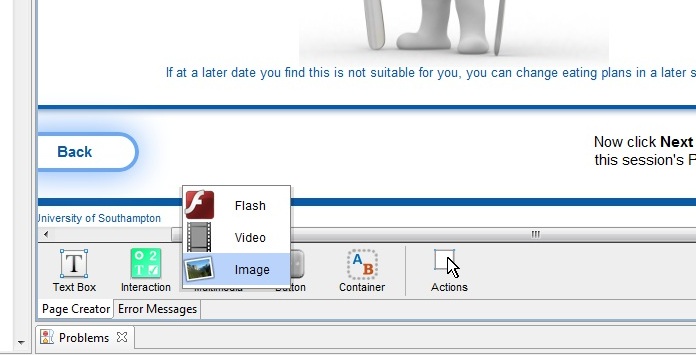
- To enter it onto a page click the 'multimedia' button on the bottom tool bar and select 'Image'
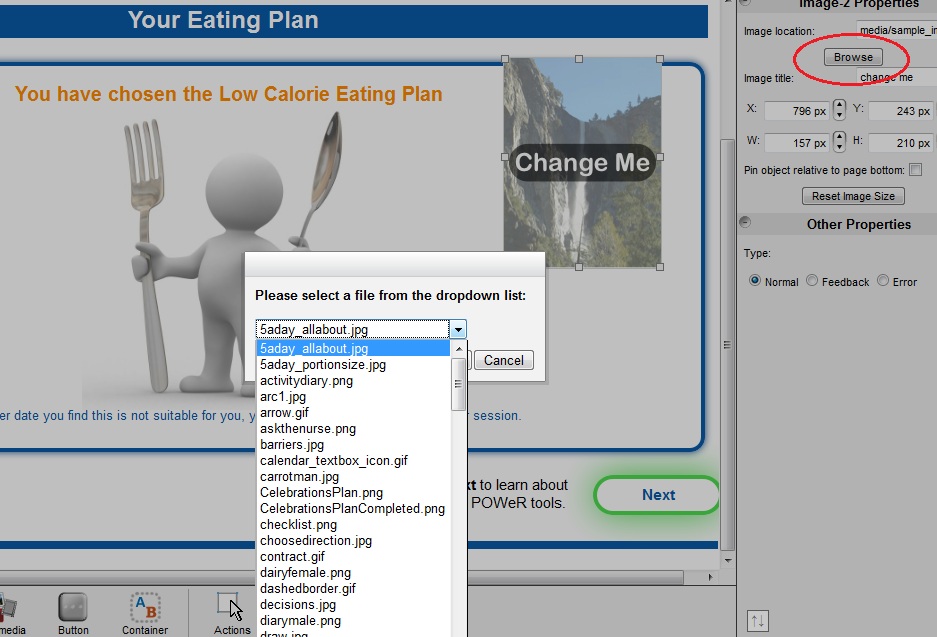
- A generic image will appear with 'change me' written across it
- When this is selected, the tool bar on the left will be 'image properties'
- Click 'Browse' and select your image from the drop down list
- You can then adjust the size of your image and move it around the page until you are happy with it
Use these images to help you:
Two important considerations when adding images to your intervention
- It is important, for ethical reasons, that you give your image a meaningful title in the image title field. This is because a person with visual impairments using your intervention will use this name to help identify what the image is. The default title for each image added to the intervention is Change me and this is the name that will be presented to end-users unless this is changed. This name can include spaces and capital letters, but NOT special characters such as &,. etc.
- If using images from the web, rather than ones you have sourced yourself, it is important to check the copyright of the image. There are a number of royalty-free sites online including http://sxc.hu or http://www.istockphoto.com, however many of them need to be paid for and you may want to consider this in your research budget.


