How to change the look and feel of buttons: Difference between revisions
Jump to navigation
Jump to search
StephHughes (talk | contribs) (New page: To change the look and feel of a button follow these steps: * Click on the button you would like to change. * You will see 'Button Properties' appear on the right hand side of the authori...) |
StephHughes (talk | contribs) No edit summary |
||
| Line 6: | Line 6: | ||
It is a good idea to have all buttons with the same function within your intervention look the same, for example, all 'Next' buttons should look the same. 'Back' buttons may be a different colour to the 'Next' buttons, but for a more professional finish, make them the same overall design. | It is a good idea to have all buttons with the same function within your intervention look the same, for example, all 'Next' buttons should look the same. 'Back' buttons may be a different colour to the 'Next' buttons, but for a more professional finish, make them the same overall design. | ||
See image below - make sure you scroll down within the 'Button Properties' to make use of all the functions: | |||
[[Image:lookofbuttons.jpg]] | |||
Latest revision as of 10:34, 6 February 2013
To change the look and feel of a button follow these steps:
- Click on the button you would like to change.
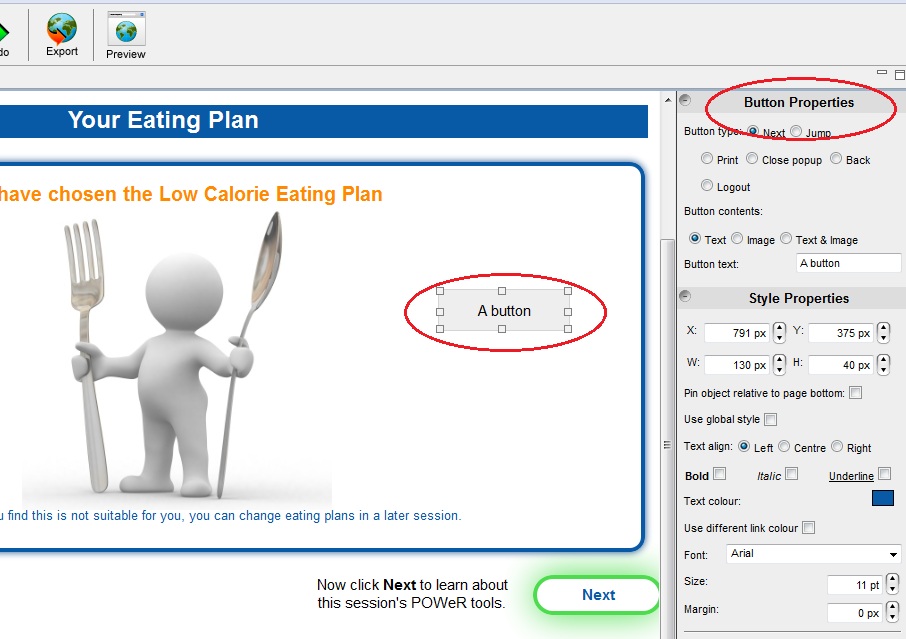
- You will see 'Button Properties' appear on the right hand side of the authoring tool.
- Within this tool bar you can change the font style, colour, size etc, along with the button border style and colour.
It is a good idea to have all buttons with the same function within your intervention look the same, for example, all 'Next' buttons should look the same. 'Back' buttons may be a different colour to the 'Next' buttons, but for a more professional finish, make them the same overall design.
See image below - make sure you scroll down within the 'Button Properties' to make use of all the functions:
