Intervention Folders: Difference between revisions
| Line 80: | Line 80: | ||
==Inviting new researchers to your folder== | ==Inviting new researchers to your folder== | ||
From the folder view, click “Edit” (Figure 7) | |||
Another major change (for privacy reasons) from the previous website is that you are no longer able to see the entire list of researchers that have registered for LifeGuide. From the folder view, click “Edit” (Figure 7). If you own existing folders with researchers, they will appear in the “Select a researcher to add” box, and can be selected and added by clicking “Add Researcher”. Otherwise, you need to add an email address in the text box, and click “Send email invitation to”. When the researcher receives the invitation, they will be able to add themselves to the folder. | |||
[[Image:folders7.png]] | [[Image:folders7.png]] | ||
Figure 7: Editing a folder. You can invite researchers, and add existing interventions. | Figure 7: Editing a folder. You can invite researchers, and add existing interventions. | ||
Latest revision as of 07:33, 29 October 2010
Introduction
Currently in the LifeGuide Community website, interventions are not organised very efficiently. Often there are several versions of each intervention, and it is hard to tell which is the main version, and which are just quick test versions. If you work on more than one intervention project, you will see all interventions from each project listed together in one place. And finally, it can be a chore for the intervention owner to have to add researchers to each new version of the intervention.
We are introducing folders for interventions, so that related versions of interventions are kept together, making them easier to work with. There will be a main intervention in each folder, together with any other trial versions. And intervention owners will now only have to add new researchers to the folder, who will then have access to all the versions in the folder.
Eventually all interventions will be kept in folders – but it may take a while to get your projects organised. This document will help you get used to the new features, and start using folders.
What you will see when you log in
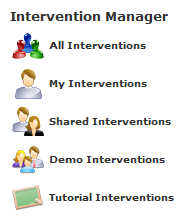
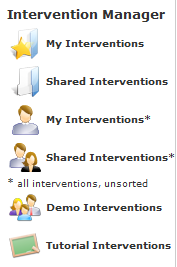
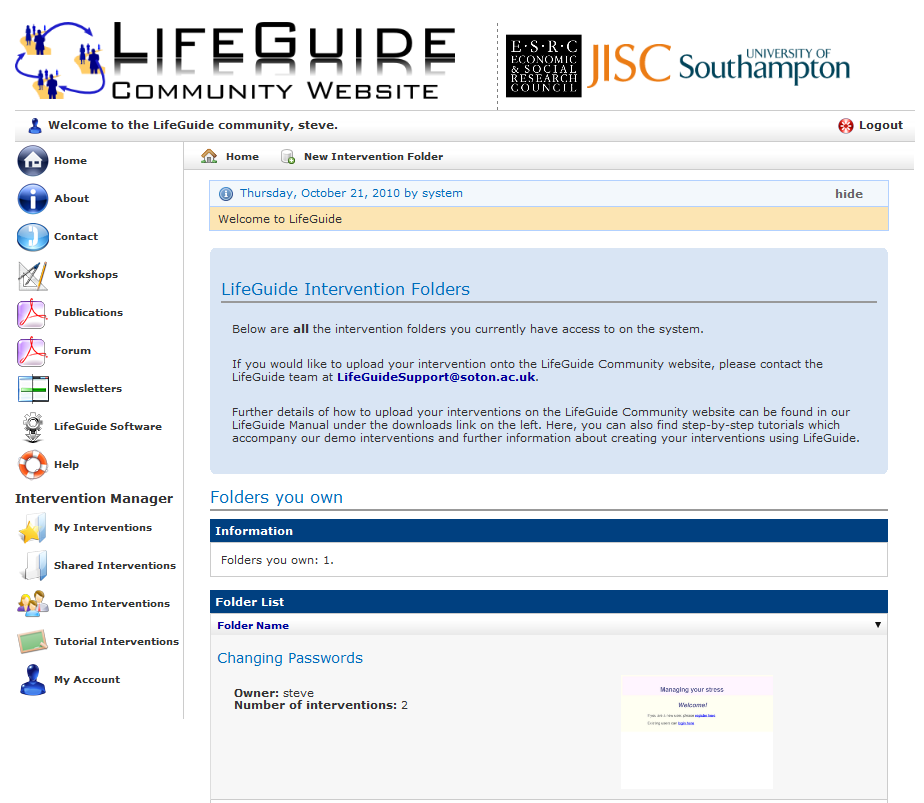
Previously, after logging in, you saw a list of all interventions that you have access to (Figure 1). Now you will see a list of folders that you have access to (Figure 2). Early in the transition period to using folders, you may not have any folders at all. During this time, you will still be able to access interventions that are not in folders, as described here.
Figure 1: Part of the old-style LifeGuide Community website menu
Figure 2: Part of the new-style LifeGuide Community website menu
In the old website the menu items for viewing lists of interventions were:
- All Interventions: Listed every intervention that you had access to. This list included all the interventions accessible from the next four items.
- My Interventions (researchers only): Listed interventions that you owned, and could edit, delete, etc.
- Shared Interventions: Listed interventions owned by someone else, but that you had access to.
- Demo Interventions: Listed interventions that were available for discussion with all users registered on the LifeGuide site.
- Tutorial Interventions:Listed illustrative interventions relating to the Authoring Tool user manual.
The new website has the following menu items:
- My Interventions (researchers only): Lists folders of interventions that you own, and could edit, delete, etc.
- Shared Interventions: Lists folders of interventions owned by someone else, but that you have access to.
- My Interventions* (researchers only): The same as “My Interventions” in the old website (to access interventions that are not yet in folders)
- Shared Interventions*: The same as “Shared Interventions” in the old website (to access interventions that are not yet in folders)
- Demo Interventions: The same as “Demo Interventions” in the old website.
- Tutorial Interventions: The same as “Tutorial Interventions” in the old website.
Note that when all interventions have been placed into folders, the items marked with asterisks will no longer be needed, and will be removed.
The list of folders
When you view the list of folders, you will be able to see the owner of each folder, and the number of interventions contained in it. See Figure 3.
Figure 3: The initial screen after login, showing the folder view.
Viewing a folder
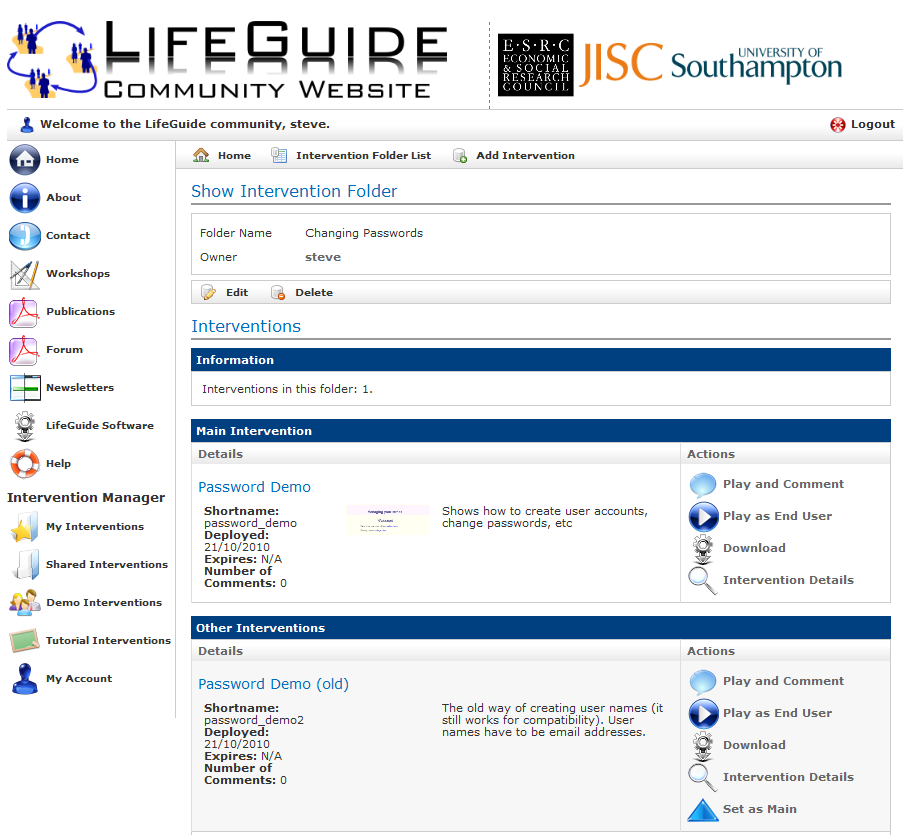
By clicking on a folder, you will see the interventions that are contained inside it (Figure 4).
Figure 4: The view of a folder's contents.
Creating a new folder
If you have permission to upload interventions to the LifeGuide Community website, you will be able to create a new folder by clicking “New Intervention Folder” at the top of the Intervention Folder list. (Bear in mind that a folder is intended to keep all interventions for a project, so you will probably not need to do this very often.)
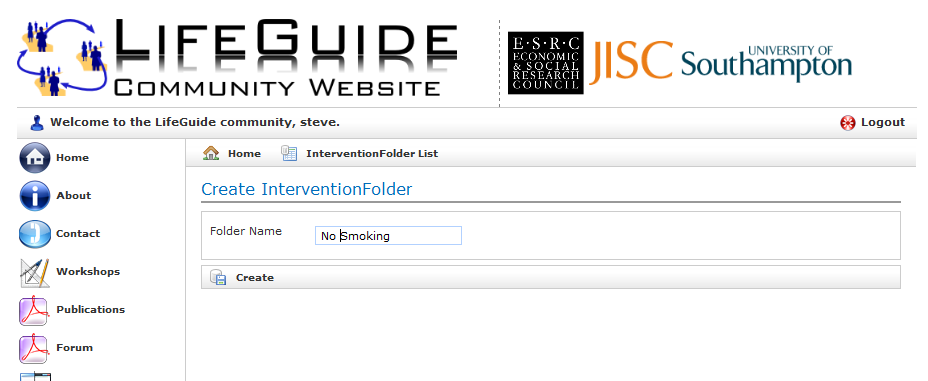
On the next page, you can specify the Folder name (Figure 5):
Figure 5: Creating a new folder.
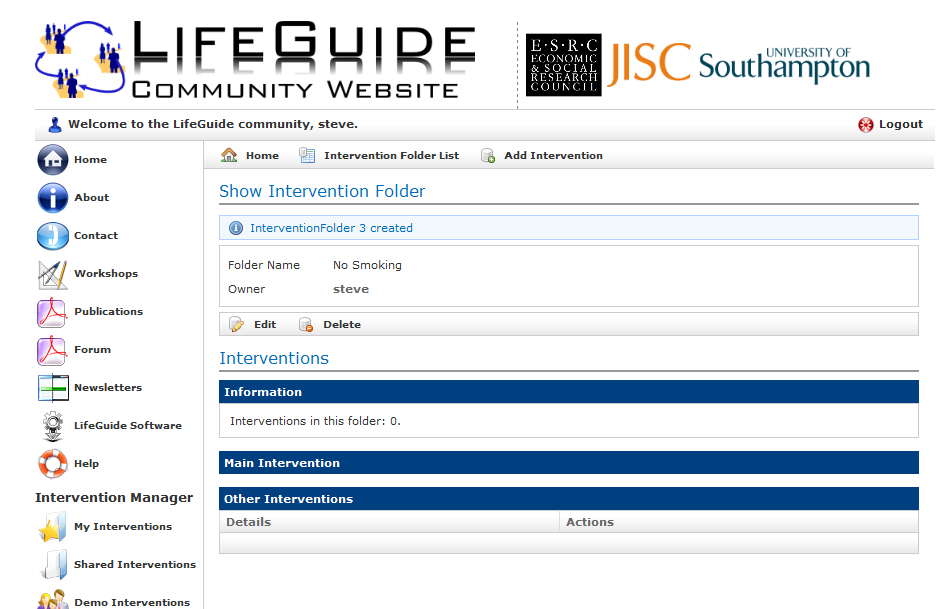
After clicking “Create”, you will see your new (empty) folder (Figure 6). You will automatically be added as the owner of the folder, and you will be able to add new interventions, and invite new researchers to the folder.
Figure 6: The new folder.
Adding existing interventions to a folder
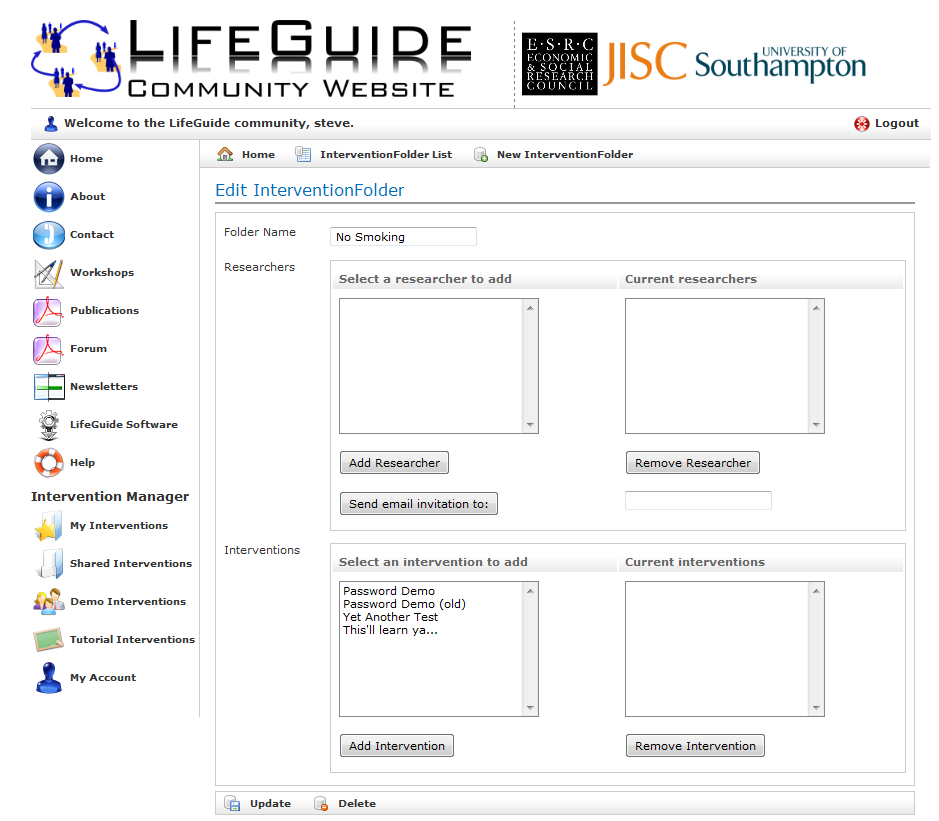
While editing the folder (Figure 7), you will be able to add any interventions that you own to your folder. This will normally be used for organising existing interventions into folders, as new interventions will be added as described in “Adding a new intervention to a folder”.
Adding a new intervention to a folder
When you are viewing a folder, clicking "Add Intervention" will allow you to create a new intervention as usual. When you create the intervention, it will be added to the folder, and you will be returned to the folder view.
Setting the main intervention in a folder
Any intervention in a folder can be set as the main version. Click on the "Set as Main" option next to the intervention that you wish to promote to the main intervention.
Adding existing members of your research team to your folder
After you have created a folder you will be able to click on edit to see a list of all the interventions that you currently own and a list of all the researchers you have already added to previously added to these existing interventions. You will need to re-add these researchers from the list to your new folder by selecting their name and clicking on the add researcher button. This means that these researchers will be able to see any intervention that you add to your folder meaning that you will not need to re-add them each time to you add a new intervention.
Inviting new researchers to your folder
Another major change (for privacy reasons) from the previous website is that you are no longer able to see the entire list of researchers that have registered for LifeGuide. From the folder view, click “Edit” (Figure 7). If you own existing folders with researchers, they will appear in the “Select a researcher to add” box, and can be selected and added by clicking “Add Researcher”. Otherwise, you need to add an email address in the text box, and click “Send email invitation to”. When the researcher receives the invitation, they will be able to add themselves to the folder.
Figure 7: Editing a folder. You can invite researchers, and add existing interventions.
